
Design Tip of the Week: Creating a Color Palette for Reference in PS
Design Tip of the Week: How to Create a Color Swatch from a Photo in PS
Creating a color palette before getting your hands dirty will help you work more efficiently. If you know which colors you’re inspired by, let’s create our palette and say goodbye to extra hassle.
Step One. Choose an image that inspires you. Open in PS. Then, go to Filter > Texture > Stained Glass

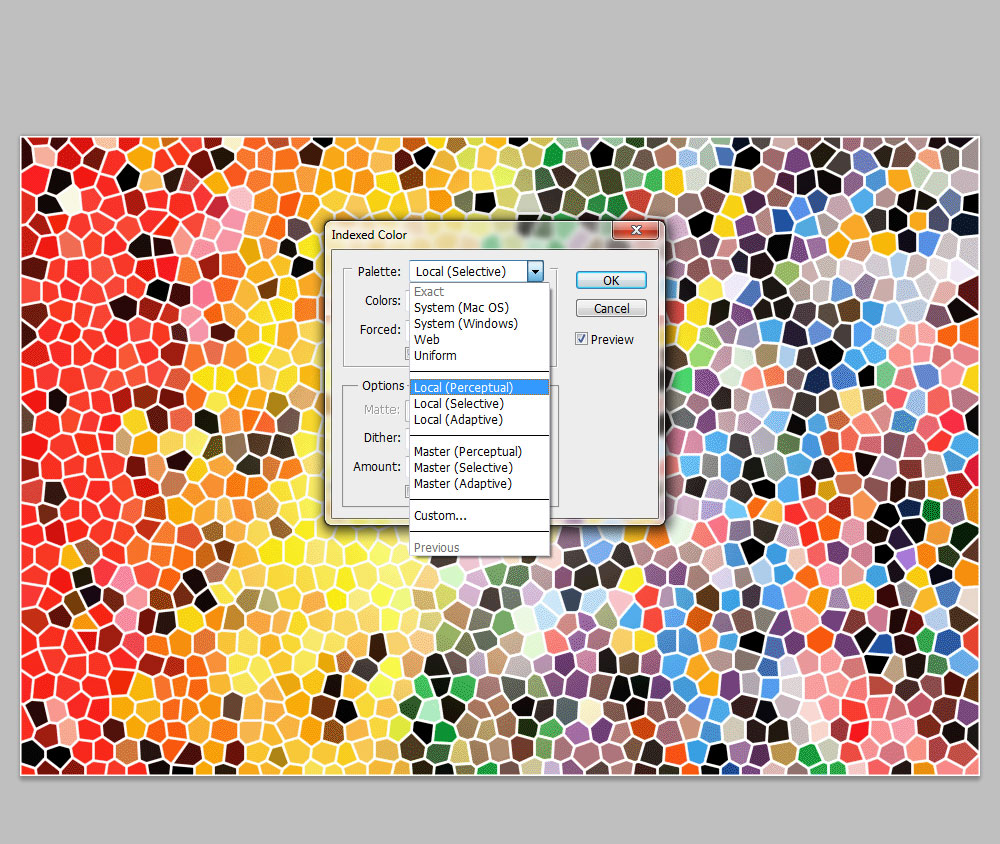
Step Two. Head up to your menu, then choose Image > Mode > Indexed Color. From the options, choose “Local Perceptual.” For the color number, choose the number of colors you’d like in your palette. I’m choosing to enter “50.” Press OK.
Step Three. Go to Image > Mode > Color Table to see the colors you’ve created. Then, press save to save your file.

Step Four. Go to your swatches panel. From the drop-down, head to Load Swatches. (Or, if you’d prefer, Replace Swatches) Then, choose the .act file we just created. Your swatches will appear in your swatches panel!

Now get to work, you crazy kids!
Comments are closed.